Ultimate Tape-In Hair Extension Guide for Black Female
Tape-in hair extensions are a revolutionary method of enhancing hair length and volume with a natural look. For hair industry professionals, hair stylists, salon owners, and retailers, understanding the intricacies of tape-in hair extensions is essential to provide clients with the best possible service. This comprehensive guide covers everything you need to know about tape-in hair extensions, from selection to application and maintenance, with a focus on tape-in for black female clients.
Table of Contents
- Introduction to Tape-In Hair Extensions
- Benefits of Tape-In Hair Extensions for Black Female Clients
- Choosing the Right Tape-In Hair Extensions
- Preparing for Application
- Step-by-Step Application Guide
- Maintenance and Care Tips
- Common Issues and Troubleshooting
- Removing Tape-In Hair Extensions
- Conclusion
1. Introduction to Tape-In Hair Extensions
Tape-in hair extensions are a popular choice for adding length and volume to natural hair. They consist of small wefts of hair with a special adhesive tape that attaches to the natural hair. These extensions are favored for their lightweight feel, natural appearance, and versatility in styling. For black female clients, tape-in extensions can be particularly beneficial due to their ability to blend seamlessly with various hair textures.
2. Benefits of Tape-In Hair Extensions for Black Female Clients
Natural Look and Feel
Tape-in hair extensions are designed to lay flat against the scalp, creating a natural and undetectable look. For black female clients, these extensions can be matched to natural hair textures, ensuring a flawless blend.
Versatility in Styling
Tape-in extensions can be styled just like natural hair. They can be straightened, curled, and even colored, offering endless styling possibilities. This versatility is ideal for clients who love to change their hairstyle frequently.
Low Maintenance
Compared to other types of extensions, tape-in hair extensions require relatively low maintenance. With proper care, they can last for several weeks, providing clients with long-lasting beauty.
Minimal Damage
The adhesive used in tape-in extensions is gentle on the natural hair, minimizing the risk of damage and breakage. This makes them a safer option for clients concerned about the health of their natural hair.
3. Choosing the Right Tape-In Hair Extensions
Selecting the right tape-in hair extensions is crucial for achieving the best results. Here are some key factors to consider:
Hair Quality
Always opt for high-quality, 100% human hair extensions. Remy hair is particularly recommended as it retains the cuticle layer, ensuring a natural look and longer lifespan.
Texture and Color
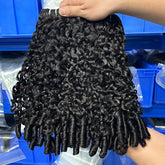
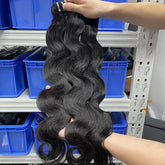
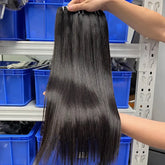
For black female clients, it's essential to match the extensions to their natural hair texture. Choose from a range of textures, including straight, wavy, curly, and kinky straight, to ensure a seamless blend. Additionally, the color should match the client's natural hair or be easily customizable to achieve the desired look.
Adhesive Quality
High-quality adhesive tape is crucial for the longevity of the extensions. Look for tapes that are strong, durable, and hypoallergenic to prevent any adverse reactions.
4. Preparing for Application
Proper preparation is key to a successful tape-in hair extension application.
Client Consultation
Conduct a thorough consultation with your client to understand their needs, preferences, and any concerns they may have. Discuss the desired outcome, maintenance routine, and potential challenges.
Hair Preparation
Ensure the client's hair is clean and free from oils and styling products. Wash the hair with a clarifying shampoo to remove any buildup that could affect the adhesive.
Sectioning
Section the hair into neat, manageable parts. This will facilitate the application process and ensure even placement of the extensions.
5. Step-by-Step Application Guide
Step 1: Measuring and Cutting the Wefts
Measure the tape-in wefts against the client's head and cut them to the desired width. Ensure the wefts are not too wide to avoid bulkiness and ensure a natural look.
Step 2: Applying the First Weft
Take a thin section of the client's hair and place it between two tape-in wefts, sandwiching the natural hair. Press firmly to ensure the adhesive bonds securely.
Step 3: Repeating the Process
Continue applying the wefts row by row, ensuring even spacing and a natural flow. Avoid placing the wefts too close to the scalp to prevent discomfort and tension.
Step 4: Blending the Extensions
Once all the wefts are applied, blend the extensions with the natural hair using a flat iron or curling iron. Trim and style the hair as desired to achieve a cohesive look.
6. Maintenance and Care Tips
Proper maintenance is essential to prolong the life of tape-in hair extensions and keep them looking their best.
Washing
Wash the extensions with sulfate-free shampoos and conditioners to avoid stripping the hair of its natural oils. Avoid applying conditioner near the tape to prevent slippage.
Drying
Gently pat the hair dry with a towel and let it air dry whenever possible. If using a blow dryer, set it to low heat to prevent damage to the adhesive tape.
Brushing
Use a wide-tooth comb or a brush designed for extensions to detangle the hair. Start from the ends and work your way up to the roots, being gentle to avoid pulling on the tape.
Sleeping
Before sleeping, tie the hair in a loose braid or ponytail to prevent tangling. Use a silk or satin pillowcase to reduce friction and maintain the hair's smoothness.
7. Common Issues and Troubleshooting
Slippage
If the extensions start slipping, it may be due to improper application or product buildup. Reapply the extensions using fresh adhesive tape and ensure the hair is clean before application.
Itching
Itching can occur due to the adhesive or the hair extensions themselves. Use hypoallergenic tapes and ensure the hair and scalp are clean. If itching persists, consult with a dermatologist.
Tangling
Regularly detangle the hair and use a leave-in conditioner to keep the hair smooth and manageable. Avoid excessive heat styling and protect the hair while sleeping.
8. Removing Tape-In Hair Extensions
When it's time to remove the extensions, follow these steps to ensure a safe and gentle removal process:
Step 1: Apply a Removal Solution
Apply a tape-in hair extension removal solution or a few drops of coconut or olive oil to the adhesive tape. Let it sit for a few minutes to break down the adhesive.
Step 2: Gently Peel Off the Wefts
Once the adhesive has loosened, gently peel off the wefts starting from the edges. Avoid pulling to prevent damage to the natural hair.
Step 3: Clean the Hair
After removing the extensions, wash the hair with a clarifying shampoo to remove any adhesive residue. Deep condition the hair to restore moisture and ensure it remains healthy.
9. Conclusion
Tape-in hair extensions offer a fantastic way for black female clients to enhance their hair's length and volume while maintaining a natural look. By following the steps and tips outlined in this guide, hair industry professionals, hair stylists, salon owners, and retailers can provide their clients with the best possible experience. From selecting the right extensions to mastering the application process and ensuring proper maintenance, this ultimate guide covers all you need to know about tape-in hair extensions.
With the right knowledge and skills, you can help your clients achieve their hair goals, boosting their confidence and satisfaction with their new look. Happy styling!


